

- Robotics - Automation - Industrial IT
- Automation
- Terminal with touch screen
- Posiflex Technology


- Company
- Products
- Catalogs
- News & Trends
- Exhibitions
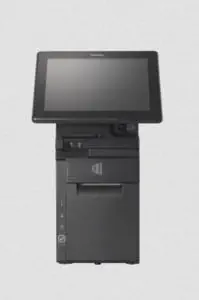
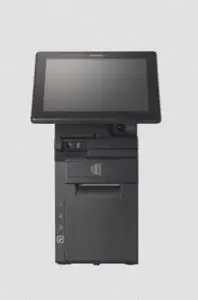
Touch screen terminal HS-3114Atable-topwith printer24V DC

Add to favorites
Compare this product
Characteristics
- Interface
- touch screen
- Mounting
- table-top
- Integrated peripheral
- with printer
- Other characteristics
- 24V DC
- Applications
- POS
Description
S-3114A desktop POS (x 1)
24V/60W Power Adaptor (x 1)
Power cord (x 1)
3-inch wide thermal paper roll (x 1)
Paper separator for 2” thermal paper roll (x 1)
Desktop mounting kit pack (x 1)
(including 1 bottom plate, 1 desktop
mounting bracket, 4 fixing screws, and 4
plastic anchors)
User manual (x 1)
Connecting Power Adapter
Please refer to the following instructions on how to connect power adapter to
HS-3114A and to organize your cables.
1. Lay your desktop POS on a level surface
with its touch screen facing down as shown
in the figure.
2. Hold the bottom I/O interface cover with
your thumb and forefinger, and then gently
pull the cover outwards to remove the
cover.
3. Connect power adapter and I/O cables to
the bottom I/O interface.
4. Have the cover join to the wedge portions
of the bottom I/O interface.
5. Before pushing the cover back into place,
neatly thread the cables through the cable
exit.
6. Press down the cover to close the bottom
I/O interface chamber.
Loading 2” or 3” Paper Rolls
Before operating the printer, please follow the below steps to load a paper roll.
1. To open the paper roll cover, push down the
paper roll cover release lever in the direction
shown in the figure.
2. Before installing 2-inch paper roll in the thermal printer, place paper
separator in the paper roll compartment by following the instructions
below. If you are using 3” paper roll for the printer, please skip to
next step.
2.1. Hold the separator with the sharppointed side down.
2.2. Push the sharp-pointed part of paper
separator into the slot on the bottom
of the paper roll compartment.
Catalogs
No catalogs are available for this product.
See all of Posiflex Technology‘s catalogsOther Posiflex Technology products
All In One POS




Related Searches
- Display module
- LCD display module
- Industrial display module
- TFT LCD display module
- Color display module
- HMI with touch screen
- Control panel display module
- RS-232 display module
- Graphic display module
- LCD HMI terminal
- Digital signage display module
- RFID reader-writer
- 7" display module
- Barcode scanner
- Monochrome display module
- Dot-matrix display module
- USB HMI terminal
- 10" display
- TFT LCD HMI terminal
- Alphanumeric display module
*Prices are pre-tax. They exclude delivery charges and customs duties and do not include additional charges for installation or activation options. Prices are indicative only and may vary by country, with changes to the cost of raw materials and exchange rates.
About DirectIndustry
DirectIndustry is a marketplace that offers B2B players a complete experience, from product sourcing to purchase. DirectIndustry is an entity of VirtualExpo Group.
Are you a buyer?
Are you a supplier?
© 2026 All rights reserved - Terms - Privacy policy - General Terms - Manage cookies - 鄂ICP备2026053537号-2 -